I recently discovered the Dodge/Burn tool on GIMP, and it’s a bit of a game changer!
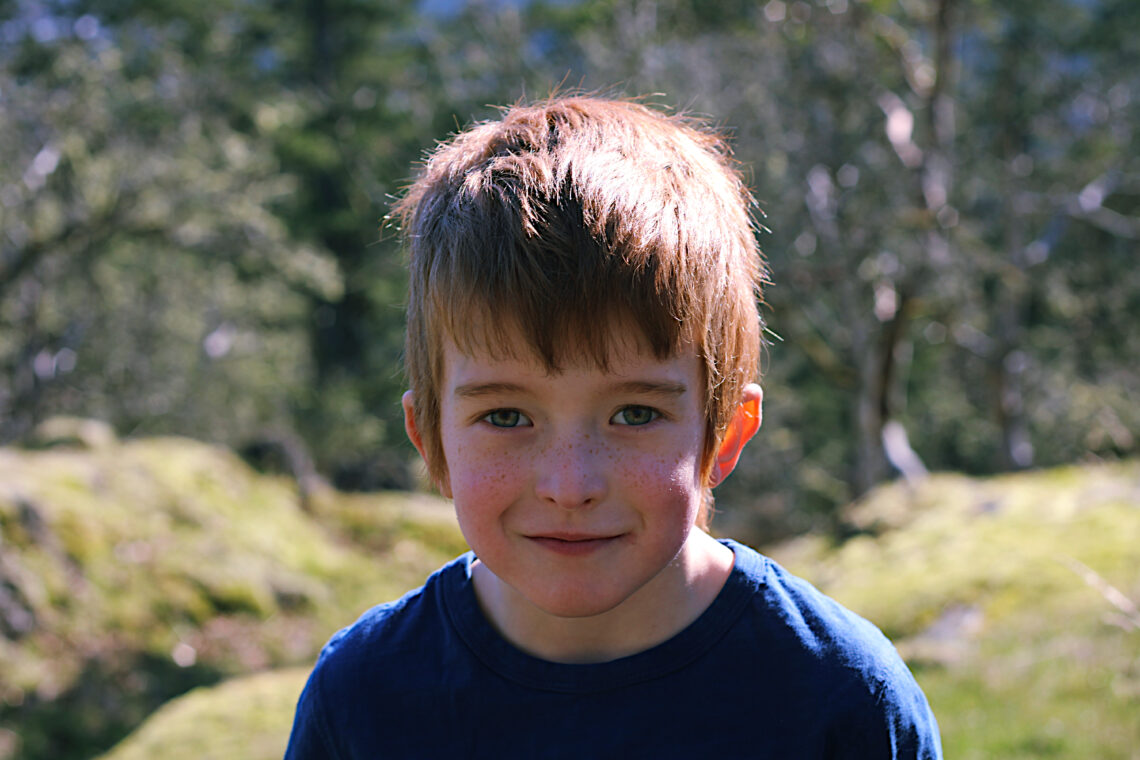
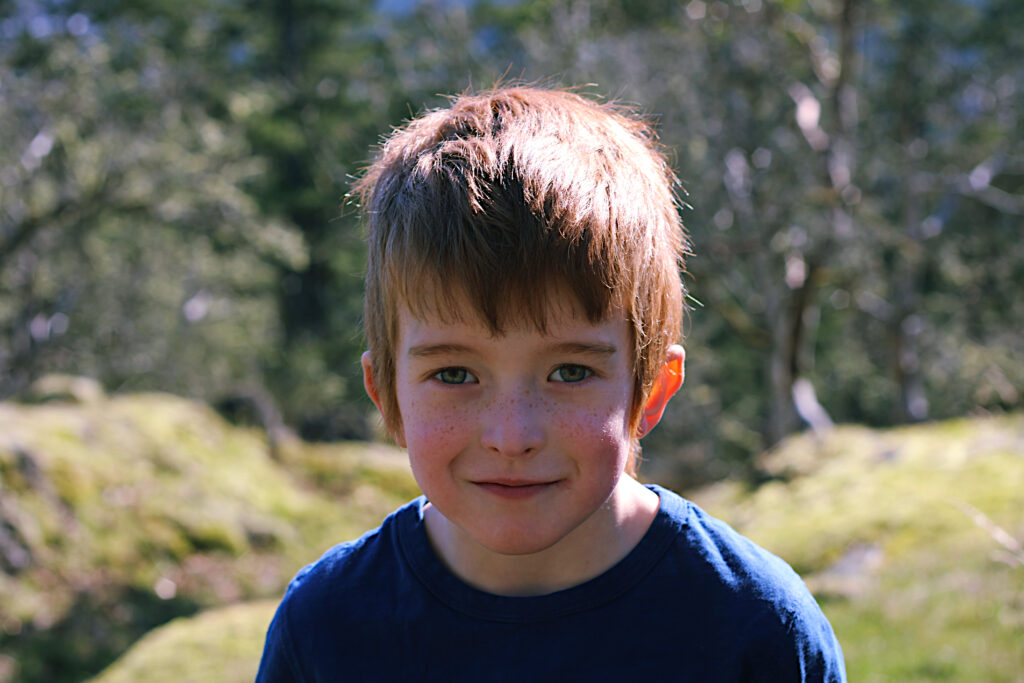
We went for a little hike up Mill Hill and this guy was really into taking photos! It was great for me that he was in the mood, because it allows me to practice photo taking and photo editing. This time, I decided to practice using the dodge/burn tool.
The dodge/burn tool allows you to lighten or darken specific areas on your photo without affecting the hue or saturation. This is useful in case if there are only certain areas which you would like to adjust the lightness or darkness of. You can pick the size of your brush, the hardness or softness, the opacity, and more.
Sometimes, when taking portraits of people, their eyes seem to come out very dark, in my relatively new experience, anyway. One way to combat this is to use a light reflector to shine on the subject’s face. However, if you are like me and you do not have a reflector, you can use GIMP!
Using the Dodge/Burn tool, I zoomed way in to the subject’s eyes, and drew around the iris with a low opacity dodge setting, and then went over it on the burn setting. The suggestions I saw online recommended full opacity; however, I personally found that this looked too unnatural. After I toned the opacity to around 40%, I was much happier with the results.
The suggestions I saw online also recommended to draw over the entire eye – whites, pupils, and all. I also thought this resulted in a strange appearance, and opted to just draw over the irises. I think this provides more information about the eyes to come out, whilst still looking more natural.


